
Hitch & Stitch
- the_thrift_gift

- Jan 26, 2020
- 3 min read


For the first ‘recycling’ post, looking at ways to reinvent and upcycle your clothes I am going to start off super easy with a non-permanent way to take up garments!
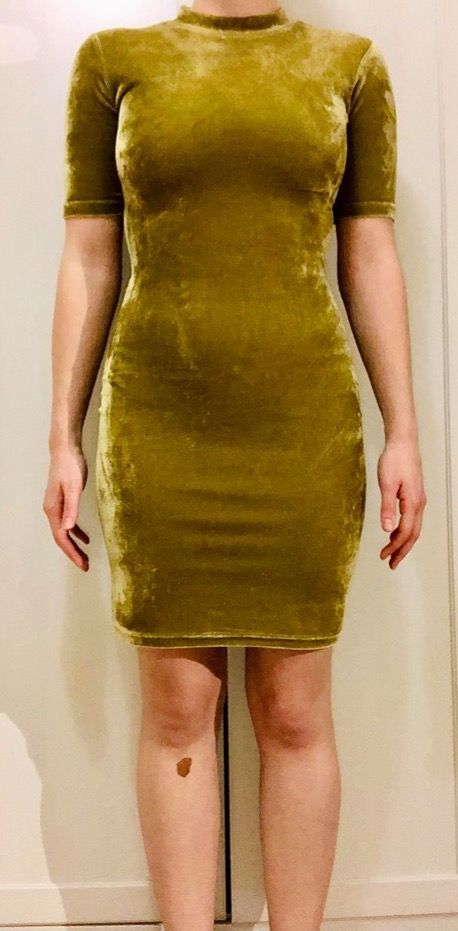
This method is perfect if you only have basic sewing equipment, like a needle and thread and are not confident using a sewing machine. Also, there is no cutting the garment involved so it’s completely reversible! Something that is ideal if you’re like me and prefer to wear tights with a short mid-thigh skirt in the winter, then let the skirt back down in the summer to wear with bare legs.
Finally, this is a great quick craft if you are petite like me, as I often opt for a shorter shirt, so that I look more in proportion and my legs look longer.
This method will work for…
· Garments: Skirts, Dress (I haven’t, but you can try it with shorts or trousers too).
· Style: Straight, A-line or Body-Con (It won’t work with pleated, skater skirt, or anything with flowy/excess material at the bottom).
Equipment
· Needle
· Thread (any colour, it doesn’t need to match the garment as it will not be seen)
· Scissors (they don’t need to be material scissors, simply sharp ones as we’re just cutting thread)
Method
1. Put your garment on, then fold the bottom of the garment up in on itself so that it is tucked up and hidden on the inside. This should be done in one-fold. Make sure it is even all the way round, then once you have folded it up to the desired length pin it in place. (Note: Avoid hitching higher than 4 inches as this will create too much excess and it may not hang neatly).


2. Take off the garment, turn it inside out and lay it out flat. With a measuring tape or a ruler, measure and make a note of how much material you have folded up. (For me here it’s 3.5 inches).


3. Find the inside seam, this will be on the inside of the garment where two pieces of material have been sewn together. It will either be an overlocked flap of material, or two little flaps of material that look the same as whatever the pattern on the outside of the garment is.

(Example of inside seam: two little flaps)

(Example of inside seam: overlocked flap)
4. Mark the previously taken measurement on the inside seam with a pencil or bit of chalk, (there should be an inside seam at each side of the clothing, and maybe one at the front or back). Ensure the material is folded up to this marked point and pin the top of the fold to the inside seam’s flap. As you’re pinning through this flap, the pins should not be visible from the outside of the garment.
5. Thread your needle and knot the end, then hand sew the folded-up material to the inner seam flap, being careful not to sew through the outer layer of material. Don’t worry if your sewing isn’t neat as this won’t be seen. Once you have secured it with roughly six or so stiches, then knot it off and cut the excess thread.

6. Repeat this on the other available inner seam flaps. By hand sewing to these, there should be no stitches on the outer garment. Once you have finished the hand sewing, remove all the pins.
7. Now turn your garment back out again and try it on. Be careful when stepping into the item to not tread down on the fold and rip the stitches. If it all looks good, then bravo c’est fini!

(A note on lining, if your garment is lined, then instead of sewing to the inside seam flaps, simply sew to the lining itself. However, this may cause needle holes in the lining material.)
Yours sincerely,
The Thrift Gift. X.

Comments